Let’s face it, content sliders are awesome – when done right they conserve precious screen real-estate, their interactivity helps keep your visitors engaged and especially for bloggers, they can help keep your most valuable posts in front of new visitors to your site. There are tons of slider plugins out there for WordPress, but the catch is that many of them are difficult to use, and even more difficult to get looking good in your site design.
That all changed when we tried SlideDeck 2, a new WordPress content slider plugin. This powerful plugin created by digital-telepathy makes it super-simple to create awesome sliders in minutes, without a single line of code required. SlideDeck 2 sets itself apart from the crowd by enabling you to mix together content from different places around the web (like Flickr, YouTube, etc.), and present it on the page as a gorgeous content slider. In addition to the WordPress plugin, there’s also a JavaScript developers’ kit – we use it in our Free WordPress Blog Setup page. We’ve been having a ball with the plugin, so we decided to put together this quick guide to show you how to make a dynamic WordPress content slider using SlideDeck 2.
Creating a Dynamic Source SlideDeck
We’re going to show you how to create a Dynamic Source SlideDeck that mixes together video and images from a YouTube and Flickr account. Begin by clicking on “Manage” to go to the main dashboard. This screen lets you create new SlideDecks as well as allowing you to sort/preview your existing SlideDecks.
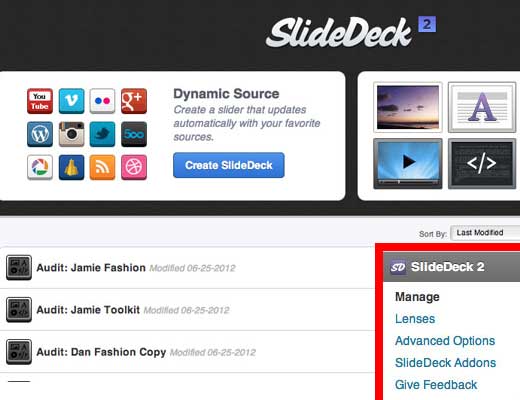
In the Dynamic Source section, click on the blue “Create SlideDeck” button. A menu window will pop up, asking you to choose your first Content Source – you’ll be able to select additional sources on the next screen, so pick one and you’ll get taken to the Dynamic Source Editor. We’re going to choose YouTube, to get a sweet video gallery going

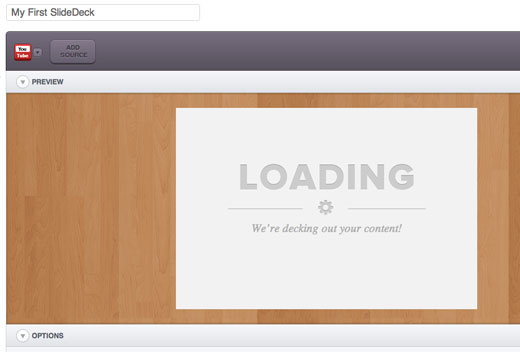
Once you land on the Dynamic Source Editor, you’ll see that YouTube has been selected as our first Content Source. Start by naming your SlideDeck, then give the YouTube icon a click, and you’ll get a nice menu tab showing all the configuration options available for this source. Enter a username (it can be yours or someone else’s) and hit ‘Apply’ to pull in the most recent videos from that user’s channel – if the user you referenced has other playlists, you can specify that you want to pull in videos from that list in the dropdown menu.


Now you get to see one of SlideDeck 2’s coolest features – the live preview window. This area of the screen lets you see your slider in real-time as you make changes to it, instead of having to refresh your post in a separate browser window. You’ll see the slider here update before your very eyes to show the latest few videos in the playlist. You can even interact with the slider in the preview area – go on, give it a try!

So that was our first Content Source – easy right? Now, we’ll add a second to give the slider some variety. Click the Add Source button in the header area of the Editor screen, and you will see the same Content Sources modal window. This time, select Flickr as the source.
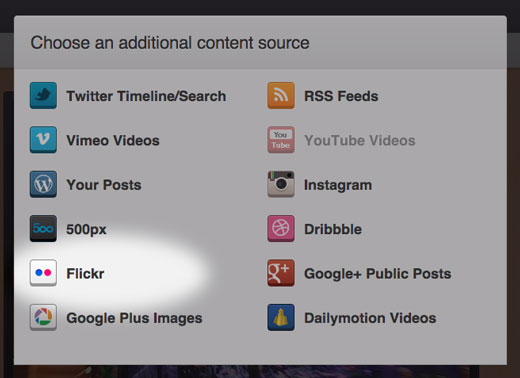
Similarly to YouTube, you can click on the Flickr icon in the header to configure the Content Source. Since Flickr requires a users’ ID number (again, yours or someone else’s) to pull in images, you’ll need to get that number – SlideDeck 2 makes it easy to figure this out, though, by linking to this handy little tool.
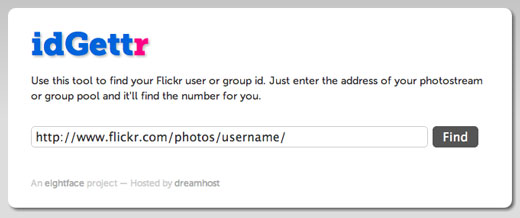
Grab the user’s ID number and paste it into the “User/Group ID” field, and choose whether you want to filter the images you display using any tags that are associated with your photos. Click “Apply” to add Images and captions from the Flickr account into your slider, and take a quick look through it.

Do you see both videos and images in there yet? If not, you may be merging content from a source that hasn’t been updated in a while, which causes it to get ‘crowded out’ by your more recently-updated sources. In this instance, you may want to try randomizing the order of the slides, as this will sometimes help – or you can begin posting more frequently to your other sources 
Configuring the Lens
Congratulations, you’ve created your first SlideDeck! Now, you could simply go ahead and save this SlideDeck, then publish it to your page – but considering all the customization options available to you, it’s probably best to utilize them. SlideDeck offers a ton of options for customizing the Lens, to make your slider look nice on the page. Scroll down to just below the Live Preview area to view the Options panel, and see what’s there.
If you haven’t noticed, there are a lot of options available, so we won’t go through them all. However we’ve grouped them together into six simple categories:
Lenses – This panel lets you choose the overall Lens that your SlideDeck uses. Applying a different Lens can completely change how your content looks on the page, so pick one that looks the closest to your overall site

Setup – This group contains general settings, like the dimensions of your SlideDeck, number of slides, etc.

Appearance – Lets you adjust things like fonts and colors

Content – Use this panel to control how the content appears in your SlideDeck – options like title length, show/hide excerpts and others live here

Navigation – Adjust and configure the navigational elements of the SlideDecks, like arrow style, navigation type, and more

Playback – Controls how your SlideDeck behaves

Saving & Publishing Your SlideDeck
Now that you’ve created your SlideDeck, added your Content Sources, and configured your Lens, there is only one step left: showing it to the world! Hit the “Save SlideDeck” button at the bottom of the editor screen to save your new SlideDeck. The page will refresh, and you’ll be presented with a few options.

From here, there are three methods for sharing your SlideDecks with your website visitors:
- Embedding it into an existing page or post
- Embedding it into a new page or post
- Using a shortcode to embed it in your page templates
All three of these methods make use of the SlideDeck shortcode – a simple little tag that represents the SlideDeck you created. It looks like this:
[slidedeck=Your SlideDeck's ID number]
That’s all there is to it! While writing your post or page content, simply click on the little purple SlideDeck icon up next to the “Insert Media” icon above the WordPress content editing window.
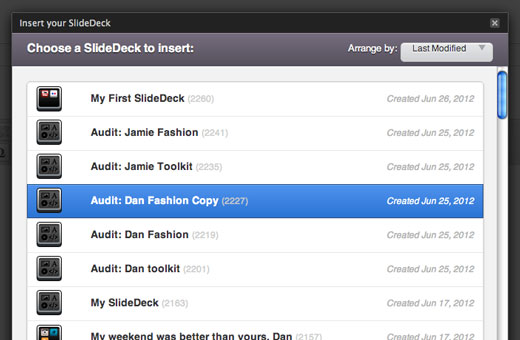
Clicking this icon will bring up the SlideDeck selector menu – from here you can easily specify which SlideDeck(s) you want to embed in your content. Click “Insert”, and your SlideDeck’s shortcode will appear in your post!


